Technical Support
How to use CGDI MB Add a New Key to Benz W211 via OBD
Unlock the convenience and security of a new key for your Benz W211 with the CGDI MB Key Programmer
If you own a Mercedes-Benz W211 and need to add a new key, you may want to consider using CGDI MB, a powerful tool that can help you do this quickly and easily. In this article, we'll provide you with a step-by-step guide on how to add a new key to your Benz W211 using CGDI MB Prog key tool.
Step 1: Connect the equipment and open the door
Step 1: Connect the equipment and open the door
The first step is to connect the CGDI Prog MB equipment to your vehicle's OBD port, open the door, and ensure that the vehicle's voltage is stable at 12V.
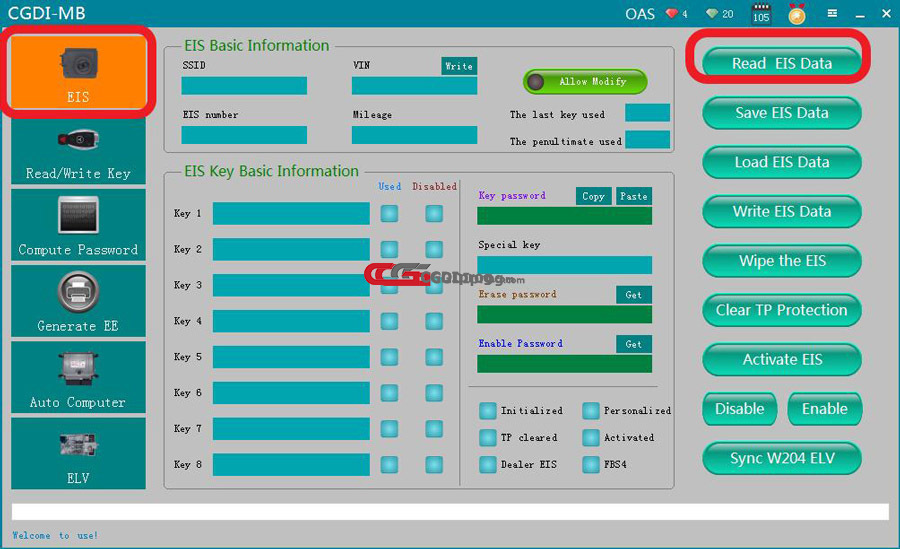
Step 2: Read EIS data
After connecting the equipment, open the CGDI MB software and click on "Read EIS Data." This will allow the software to read the data from the EIS (Electronic Ignition Switch) module in your vehicle.

Step 3: Compute password
Once the software has successfully read the data, click on "Compute Password" and choose "Copy Key with Key." Then, click on "Collect Data" to begin collecting the key data.

Step 4: Choose other keys
After the key data has been collected, choose "Other Keys" and click "OK."

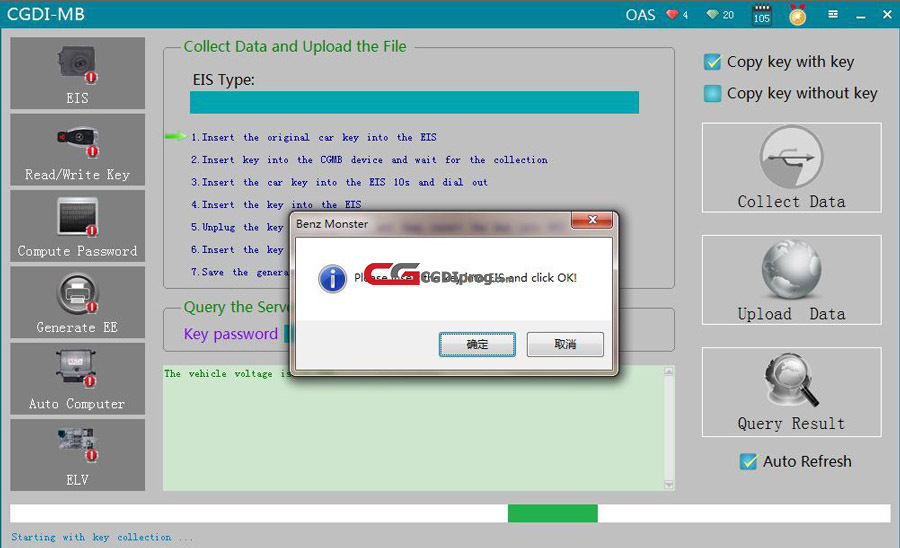
Step 5: Insert the key into EIS and CGDI MB
Next, insert the key into the EIS and click "OK." Then, insert the same key into the CGDI MB device and click "OK."

Step 6: Collect key data
The CGDI MB device will now begin collecting key data from the key you inserted. Wait until the key collection process is complete.

Step 7: Insert the key into EIS again
Once the key collection process is complete, insert the key into the EIS again and click "OK."

Step 8: Wait for 9 seconds
Wait for 9 seconds before proceeding to the next step.
Step 9: Pull out the key and insert it again


Pull out the key from the EIS and wait for 5 seconds before inserting it back in. Then, click "OK."

Step 10: Insert the key into CGDI MB Programmer again
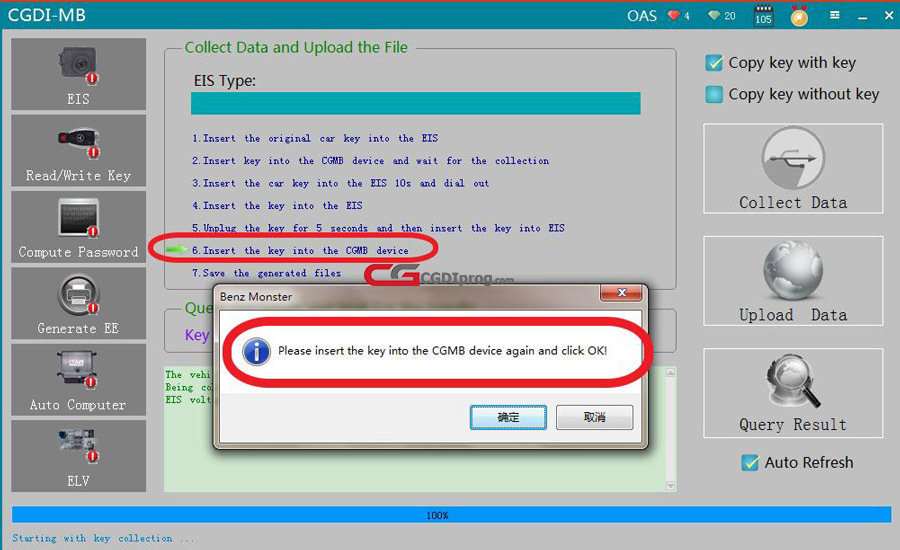
Insert the key into the CGDI MB device again and click "OK."
Step 11: Collect key data again
The CGDI MB device will now collect the key data again. Wait until the process is complete.
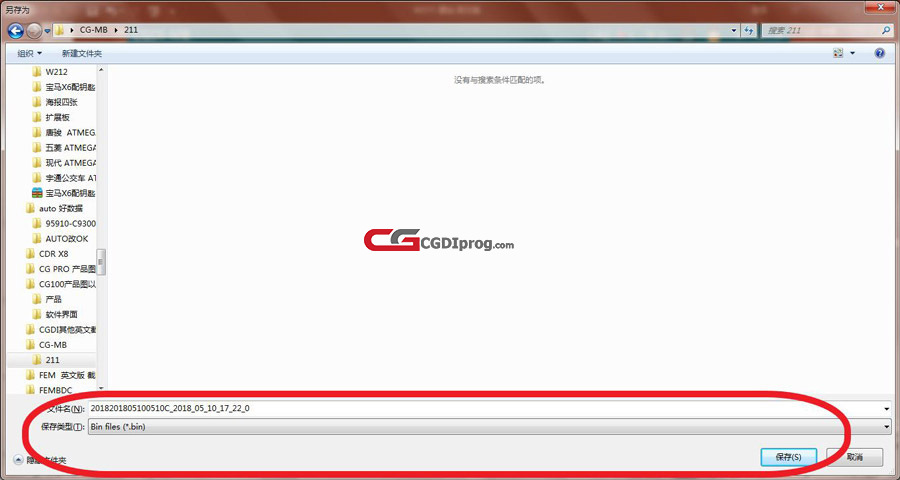
Step 12: Save the data file

Once the key data has been collected, save the file using the default file name.
Step 13: Upload the data


Click on "Upload Data" and open the file you just saved in the previous step. The data should be uploaded successfully.
Step 14: Query the result

Click on "Query Result" and wait patiently while the software computes the data.
Step 15: Copy the password

Once the data has been computed successfully, click "OK" and copy the password.
Step 16: Paste the password into EIS interface

Go to the EIS interface and paste the password you just copied.
Step 17: Save EIS data

Save the EIS data after pasting the password.
Step 18: Generate EE


Turn to "Generate EE" and load the EIS file you just saved. Check the information and click "Generate Key File."
Step 19: Save the file
Once the key file has been generated successfully, save the file.
Step 20: Read/write key


Go to "Read/Write Key" and insert the new key. The software will read the key information automatically.

Step 21: Insert the new key into EIS and start

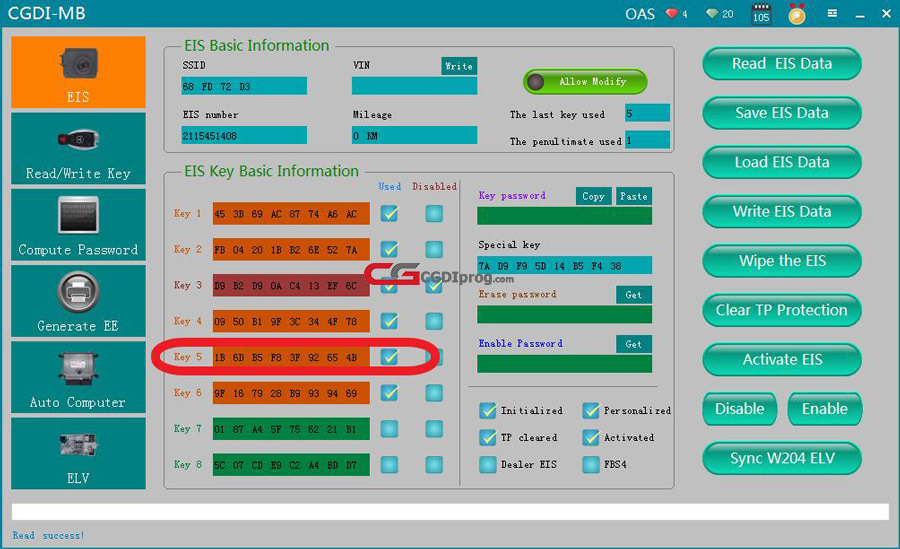
Step 22: Read EIS again, the key bit indicates that it has been used, and it can be started in combination, and the matching is successful!
Step 2: Read EIS data
After connecting the equipment, open the CGDI MB software and click on "Read EIS Data." This will allow the software to read the data from the EIS (Electronic Ignition Switch) module in your vehicle.


Step 3: Compute password
Once the software has successfully read the data, click on "Compute Password" and choose "Copy Key with Key." Then, click on "Collect Data" to begin collecting the key data.

Step 4: Choose other keys
After the key data has been collected, choose "Other Keys" and click "OK."

Step 5: Insert the key into EIS and CGDI MB
Next, insert the key into the EIS and click "OK." Then, insert the same key into the CGDI MB device and click "OK."


Step 6: Collect key data
The CGDI MB device will now begin collecting key data from the key you inserted. Wait until the key collection process is complete.

Step 7: Insert the key into EIS again
Once the key collection process is complete, insert the key into the EIS again and click "OK."

Step 8: Wait for 9 seconds
Wait for 9 seconds before proceeding to the next step.
Step 9: Pull out the key and insert it again


Pull out the key from the EIS and wait for 5 seconds before inserting it back in. Then, click "OK."

Step 10: Insert the key into CGDI MB Programmer again


Insert the key into the CGDI MB device again and click "OK."
Step 11: Collect key data again
The CGDI MB device will now collect the key data again. Wait until the process is complete.
Step 12: Save the data file

Once the key data has been collected, save the file using the default file name.
Step 13: Upload the data


Click on "Upload Data" and open the file you just saved in the previous step. The data should be uploaded successfully.
Step 14: Query the result

Click on "Query Result" and wait patiently while the software computes the data.
Step 15: Copy the password

Once the data has been computed successfully, click "OK" and copy the password.
Step 16: Paste the password into EIS interface

Go to the EIS interface and paste the password you just copied.
Step 17: Save EIS data

Save the EIS data after pasting the password.
Step 18: Generate EE


Turn to "Generate EE" and load the EIS file you just saved. Check the information and click "Generate Key File."
Step 19: Save the file
Once the key file has been generated successfully, save the file.
Step 20: Read/write key


Go to "Read/Write Key" and insert the new key. The software will read the key information automatically.

Step 21: Insert the new key into EIS and start

Step 22: Read EIS again, the key bit indicates that it has been used, and it can be started in combination, and the matching is successful!
